After a couple a days tidying the garden, and finding better storage for all the bits I have removed so far, I got back on with the task in hand... the sills.
So a second clean off with a thing that looked like a pan scourer on my angle grinder, gave both sills the FE-123 treatment. This goes on white which makes it easy to see whats been covered, unlike some of the clear versions.
View attachment 176869
I jacked up the front end just to give me a bit more wriggle room.
Just used a 1/2 inch brush
View attachment 176871
View attachment 176873
Once both side were done had to leave it to dry off, so pulled every thing that I had dumped into the boot to have a good inspection......
View attachment 176877
As you can see ....no leaking and in good condition. i can see a bit of minor surface rust down in the battery well, but dont want to disconnect the battery yet as I will need to put the roof up and down when I have to get to the rear shocks.
In fact after a wipe over with a damp cloth...( I bet
@andyglym will be impressed
)")
) the rear end looks to be in reasonable condition.......until you look underneath!!!!
View attachment 176903
Removed the spare wheel....
View attachment 176879
View attachment 176881
I think this is destined for a skip !! As Lee would say......a bit on the crusty side !!!
The plastic carrier will clean up on, but the support cage is too far gone, and will have to be persuaded off with an angle grinder. ( when its in the air ...as cant easily get to it at the moment). So better start getting a shopping list together.
The rest looks ‘ weatherbeaten’ but seems solid enough, but will definitely require a Zedshed powder coating ....along with all the rest of the bits.
View attachment 176883
View attachment 176885
Once its dropped out I will be able to clean and treat all the underside.
I think I better start spraying all the underside bolts now and every day for the next week, if I want any chance of getting them undone.
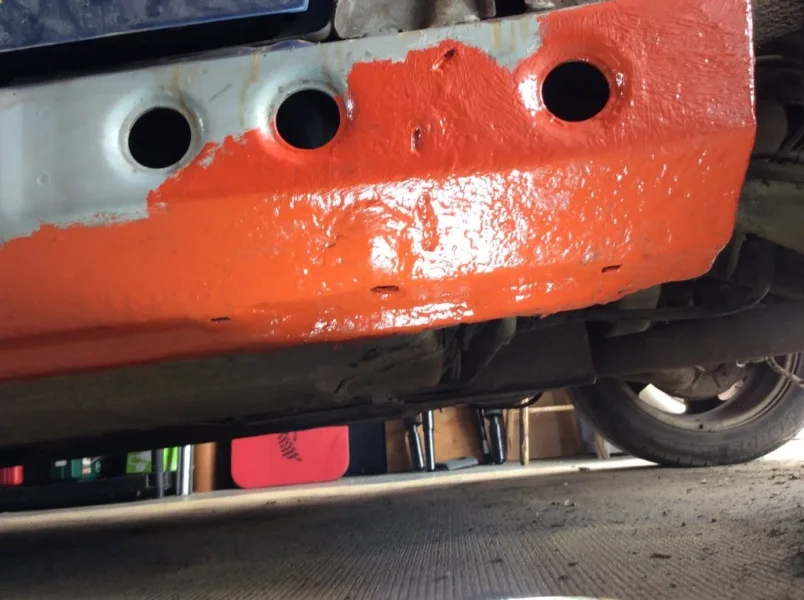
After about an hour of playing around with the stuff at the back, the sills were dry and all the rust had gone black.
So a quick overpaint with some red oxide, and then leave it for 24 hours.
View attachment 176887
View attachment 176889
View attachment 176891
View attachment 176895
View attachment 176897
View attachment 176899
Probably give them a coat of primer and then a top coat of something like a black stone chip.
View attachment 176903


 ..............for getting me into this mess