You are using an out of date browser. It may not display this or other websites correctly.
You should upgrade or use an alternative browser.
You should upgrade or use an alternative browser.
Bognor Lean-to Project
- Thread starter Mazza
- Start date
Nuffink !!! but just glad I didn’t have to pay them )")
…..but, but , but….
……That’s a Coupe?


I couldn’t have stood watching that, never mind take any photos. Why did he have to be so savage with the grab- surely he could have gently lifted it. Probably the most valuable part of that car has now been completely crumpled
Intersting.Nuffink !!! but just glad I didn’t have to pay them
0.25 per kilo (for vehicles) over here and 0.48/0.50 per kilo for truck frames.
And also copper is the king of scrap paying 6 to 8 euros per kilo.
Wow! Your recyclers get free meals there.
That's why my wife took the pictures for me...…..but, but , but….
……That’s a Coupe?
I couldn’t have stood watching that, never mind take any photos. Why did he have to be so savage with the grab- surely he could have gently lifted it. Probably the most valuable part of that car has now been completely crumpled

After waiting to get help to lift the bonnet and get it bolted down…. Finally decided not to wait anymore and do it myself….
So worked out a different plan of action and just got on with it…
Starting point was the bonnet just sitting on the engine bay….

First thing was to jack the car up and get the wheels off.

Then remove the inner liners……
With those out, access to the bottom front wing bolt…. And removal of the front wings.


With these off you have access from underneath to see the bonnet hinges and so install the 4 bolts that hold the bonnet to the hinges.

So slid the bonnet back to near enough its correct position and got the bolts in and nipped up
I also found a split in the wheel arch liner so swapped it for the one from the donor car ( the other one can be repair later)

next problem was to be able to lift and hold the bonnet up and then get the struts installed…..after a bit of a think .. closed the garage door and used the roof beam and a strap to hold the bonnet open

( didnt take a picture until after undone everything )
)
Bit of a struggle to get one of the struts in as the bonnet too big to open fully inside the garage…. But eventually sorted it.

This bonnet had the washer system where the reservoir was at the front of the engine bay…( mine is at the back) , so cut the pipe and added a connector and clipped it on to the connector

Now self supporting…. With a kneeling pad to stop it touching the garage door

Put the wings back with just the 2 top bolts and now just need to do some tweaking to set up the shut lines.
I have also removed the two locking units from the bonnet as they need cleaning and repainting.


I will get on and get the front end sorted over the next couple of days ….. but then I will need help to get the roof in. ( new Butyl strip arrived so have everything ready to install it now.
So worked out a different plan of action and just got on with it…
Starting point was the bonnet just sitting on the engine bay….
First thing was to jack the car up and get the wheels off.
Then remove the inner liners……
With those out, access to the bottom front wing bolt…. And removal of the front wings.
With these off you have access from underneath to see the bonnet hinges and so install the 4 bolts that hold the bonnet to the hinges.
So slid the bonnet back to near enough its correct position and got the bolts in and nipped up
I also found a split in the wheel arch liner so swapped it for the one from the donor car ( the other one can be repair later)
next problem was to be able to lift and hold the bonnet up and then get the struts installed…..after a bit of a think .. closed the garage door and used the roof beam and a strap to hold the bonnet open
( didnt take a picture until after undone everything
)Bit of a struggle to get one of the struts in as the bonnet too big to open fully inside the garage…. But eventually sorted it.
This bonnet had the washer system where the reservoir was at the front of the engine bay…( mine is at the back) , so cut the pipe and added a connector and clipped it on to the connector
Now self supporting…. With a kneeling pad to stop it touching the garage door
Put the wings back with just the 2 top bolts and now just need to do some tweaking to set up the shut lines.
I have also removed the two locking units from the bonnet as they need cleaning and repainting.
I will get on and get the front end sorted over the next couple of days ….. but then I will need help to get the roof in. ( new Butyl strip arrived so have everything ready to install it now.
Great effort!
Got a pair of lights down from the loft this morning and got on with finishing off the front end…. bit of fettling and tightening up bolts etc and all done


I did have to take a fog light out as I dropped one of the screws
And put the fan and shroud back as well .
so now the roof … and I know how to assemble it thanks to @Duncodin but will need help but I have a willing volunteer ( he doesn’t know it yet though)
I did have to take a fog light out as I dropped one of the screws
And put the fan and shroud back as well .
so now the roof … and I know how to assemble it thanks to @Duncodin but will need help but I have a willing volunteer ( he doesn’t know it yet though
)

Another sunny day down in Bognor so decided to at least do something today…
Battery was a bit flat so put it on charge for an hour , and it started first time … lovely sound and no nasty noises")
So drove the car out of the garage and turned it round …. furthest it’s gone for about 4 years,


The dash looked like a christmas tree with nearly every light on … so out with my reader and after a bit of time found how to clear all the codes …. Where’s Paul Gunter when you need him
When the car was restarted …. this was the result…

All the Engine Management ones have cleared and only the handbrake and the three lights to do with the ABS we’re on . Which I expected as seats are not bolted down or plugged in.
So all looking positive
Put the car back in the garage and put the charger back on

the orange ball stops me hitting the garage wall

This way round gives me more light and space to sort the roof.
Battery was a bit flat so put it on charge for an hour , and it started first time … lovely sound and no nasty noises
So drove the car out of the garage and turned it round …. furthest it’s gone for about 4 years
,The dash looked like a christmas tree with nearly every light on … so out with my reader and after a bit of time found how to clear all the codes …. Where’s Paul Gunter when you need him
When the car was restarted …. this was the result…
All the Engine Management ones have cleared and only the handbrake and the three lights to do with the ABS we’re on . Which I expected as seats are not bolted down or plugged in.
So all looking positive
Put the car back in the garage and put the charger back on
the orange ball stops me hitting the garage wall
This way round gives me more light and space to sort the roof.
Attachments
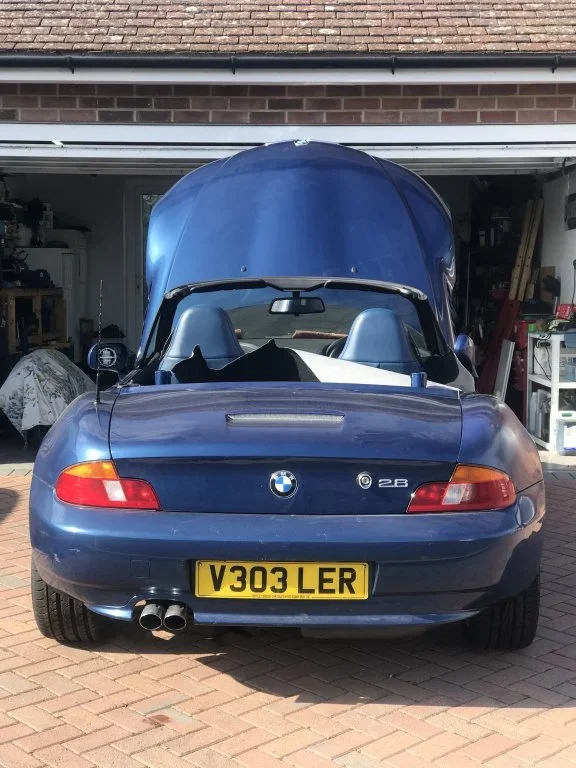
I have a set of the Z3 boot badges if you want them? I took my old bootlid to the tip the other day and thought it was worth rescuing the badges first!
Hi John… thank you for the offer, but you got me thinking ….
I have a spare boot lid from the donor car that has them on..

so I could swap the boot lids … but I would then have to swap over the 2.8 badges

Then remembered I had a pair stuck on my spare parts box in the garage….

just need to find something to stick them on the car with. ( and I can make a template to get them positioned correctly )
I have a spare boot lid from the donor car that has them on..
so I could swap the boot lids … but I would then have to swap over the 2.8 badges
Then remembered I had a pair stuck on my spare parts box in the garage….
just need to find something to stick them on the car with. ( and I can make a template to get them positioned correctly )
Neither my original nor replacement boot lids had the engine size on. Nor my 1.9 actually. All pre-facelifts.
Did the engine size badges only start appearing on facelift cars?
Did the engine size badges only start appearing on facelift cars?
Did the engine size badges only start appearing on facelift cars?
[/QUOTE]
I have no idea but could be, as my 1.9 doesn’t have an engine badge and neither did the donor car
[/QUOTE]
I have no idea
but could be, as my 1.9 doesn’t have an engine badge and neither did the donor car
Last edited:

My September 97 2.8 came with the badges from new.Neither my original nor replacement boot lids had the engine size on. Nor my 1.9 actually. All pre-facelifts.
Did the engine size badges only start appearing on facelift cars?
Removing badges from panels is best done with Carp braid, it's multi filament, whereas mono filament line will break easily when it heats up cutting through the adhesive tape. That doesn't happen with braid.
Tony.
Tony.